Measure Angles in SketchUp — Step-by-Step
Leave a Comment / By How to SketchUp / October 13, 2024

Whether you're designing furniture, modeling a building, or working on a 3D concept, precise angle measurements are crucial to ensuring your SketchUp projects are accurate. SketchUp provides a range of tools to measure angles quickly and effectively, but if you're new to the software, you might need some guidance on how to make the most of these features.
In this blog post, we'll walk you through the different methods for measuring angles in SketchUp and offer some tips on how to use these tools effectively in your designs.
Why Accurate Angle Measurements Matter in SketchUp
In any design, angles are key to aligning components correctly, determining the orientation of elements, and ensuring structural integrity in physical projects. Whether you're working on architectural designs or detailed models of machinery, understanding how to measure and modify angles ensures that your 3D model will translate correctly in real-world applications.
Poorly measured angles could result in:
- Misalignment of parts
- Structural issues in architectural designs
- Aesthetic issues in detailed designs
Therefore, mastering the process of angle measurement is essential for delivering professional and accurate 3D models.
Understanding the Protractor Tool
SketchUp's Protractor Tool is your primary method for measuring angles. It mimics the functionality of a physical protractor, allowing you to measure angles between edges, faces, or within objects in your model.
Key Features of the Protractor Tool:
- Measures the angle between two intersecting points, edges, or faces.
- Can create guides to help with accurate modeling.
- Provides both on-screen angle values and precise angle inputs.
The Protractor Tool snaps to SketchUp's inference system, making it easy to align with specific model points such as the midpoint of an edge or the intersection of two faces.
How to Measure Angles with the Protractor Tool
Let’s break down the steps for measuring an angle using the Protractor Tool:
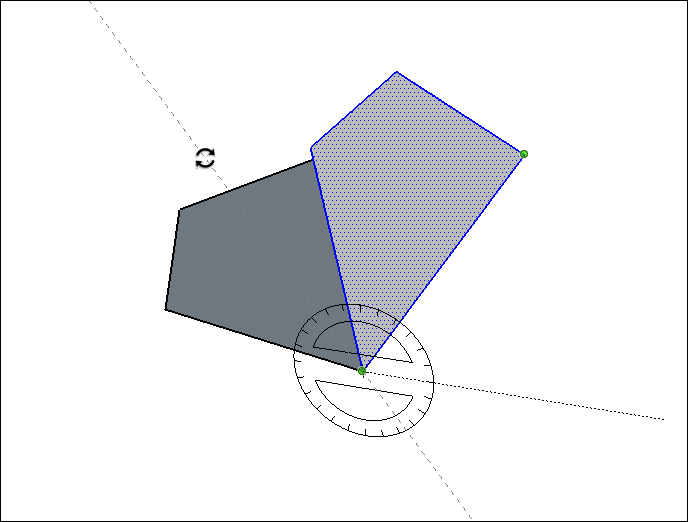
Step 1: Select the Protractor Tool
- Go to the Tools menu and select Protractor, or simply press Q on your keyboard to activate the tool.
Step 2: Position the Protractor
- Move your cursor to the point where you want to start measuring. The protractor will snap to nearby geometry like corners or edge midpoints.
Step 3: Set the Baseline
- Click to set the baseline of your angle. This is the starting edge or line from which you want to measure the angle.
Step 4: Measure the Angle
- Move your cursor to measure the angle. The protractor will show a dynamic angle measurement that updates as you move the cursor.
- Click again to set the endpoint and complete the measurement. The angle value will be displayed on-screen.
Step 5: (Optional) Input Exact Angle
- If you need an exact angle, simply type the angle value on your keyboard and press Enter. SketchUp will snap the protractor to that specific angle.
Example:
- Suppose you're measuring the slope of a roof. You can use the Protractor Tool to measure the angle between the base of the roof and the slanted roof face. This gives you the exact slope measurement, allowing you to proceed with confidence.
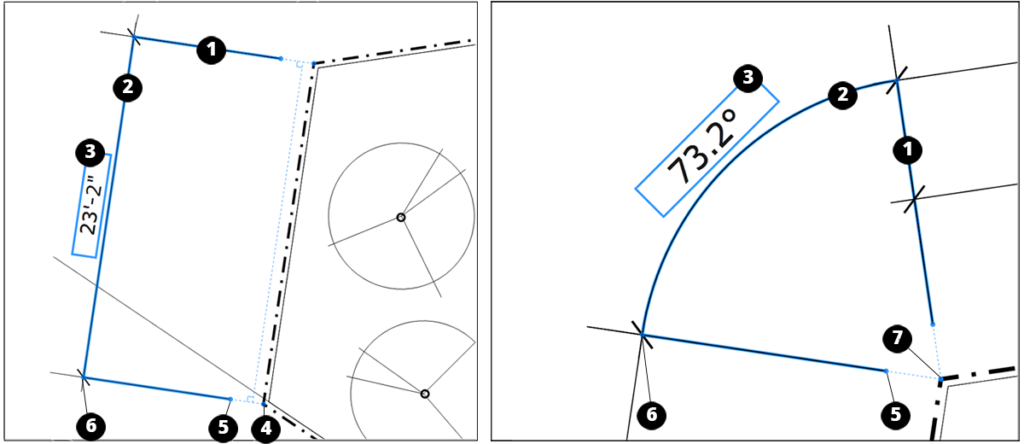
Using the Dimension Tool for Angle Measurement
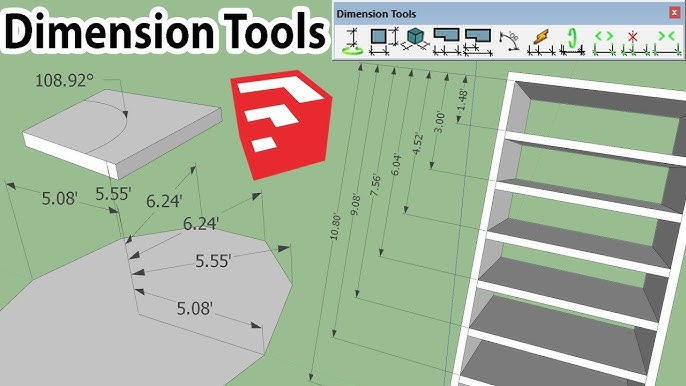
Another way to measure angles in SketchUp is by using the Dimension Tool, especially if you need to communicate measurements visually within the model.
How to Use the Dimension Tool for Angles:
- Activate the Dimension Tool from the Tools menu or press D on your keyboard.
- Select the vertices or endpoints that define the angle you want to measure.
- Drag the dimension lines into position and click to place the angle measurement within the model. The angle value will automatically be displayed.
This tool is particularly useful for presentations, as it provides clear visual indications of angles directly on your model.
Tips and Tricks for Accurate Angle Measurement
Here are a few pro tips to ensure you’re measuring angles accurately in SketchUp:
- Use the Inference System: SketchUp’s inference system helps you snap to critical points, edges, and faces. Make sure you’re snapping to the correct points when measuring angles to avoid mistakes.
- Lock Axis with Arrow Keys: If you want to measure an angle on a specific axis, you can lock the axis by pressing the arrow keys. For example, pressing the up arrow locks the measurement to the blue (vertical) axis.
- Check for Guide Points: Use guide points and lines to set reference points for tricky angle measurements. These guides can help you align the protractor correctly.
- Group Your Geometry: Before making angle measurements, group your geometry (e.g., walls, components). This helps you avoid accidentally selecting unwanted edges and ensures your measurements are precise.
Conclusion
Measuring angles in SketchUp is a fundamental skill that enhances the precision and quality of your models. With the Protractor and Dimension tools, you can easily measure angles between edges, faces, or within objects, ensuring accuracy in every step of your design process.
By following the steps outlined in this guide and leveraging the tips provided, you'll be well on your way to mastering angle measurements in SketchUp. So whether you're an architect, hobbyist, or engineer, SketchUp's measurement tools can help bring your designs to life with professional accuracy.
Feel free to leave any questions or share your experiences with measuring angles in SketchUp in the comments section!