In SketchUp, adjusting the background color of your model can enhance its presentation and visibility, especially when preparing renderings or exporting images for documentation or client presentations. While SketchUp defaults to a sky background, changing it to white can provide a clean and neutral backdrop for your models. Here’s a step-by-step guide on how to change the background of a SketchUp model to white:
Step 1: Open SketchUp:
Launch SketchUp on your computer and open the model for which you want to change the background color.
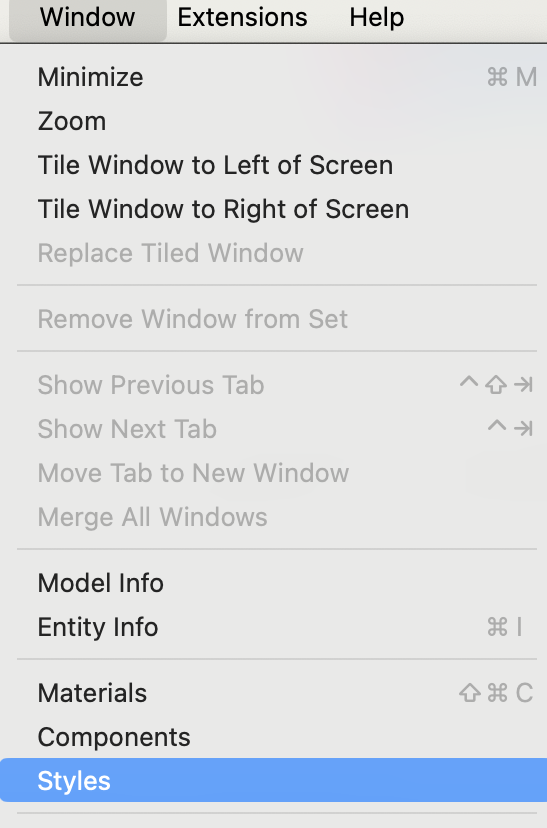
Step 2: Access the Styles Dialog:
Navigate to the “Window” menu and select “Styles” to open the Styles dialog box. Alternatively, you can use the keyboard shortcut “Alt + Shift + S” (Windows) or “Option + Shift + S” (Mac) to access the Styles dialog.
Step 3: Edit the Style:
In the Styles dialog box, you’ll see a list of available styles. Select the style that is currently applied to your model or choose a new style from the collection.
Step 4: Customize the Background:
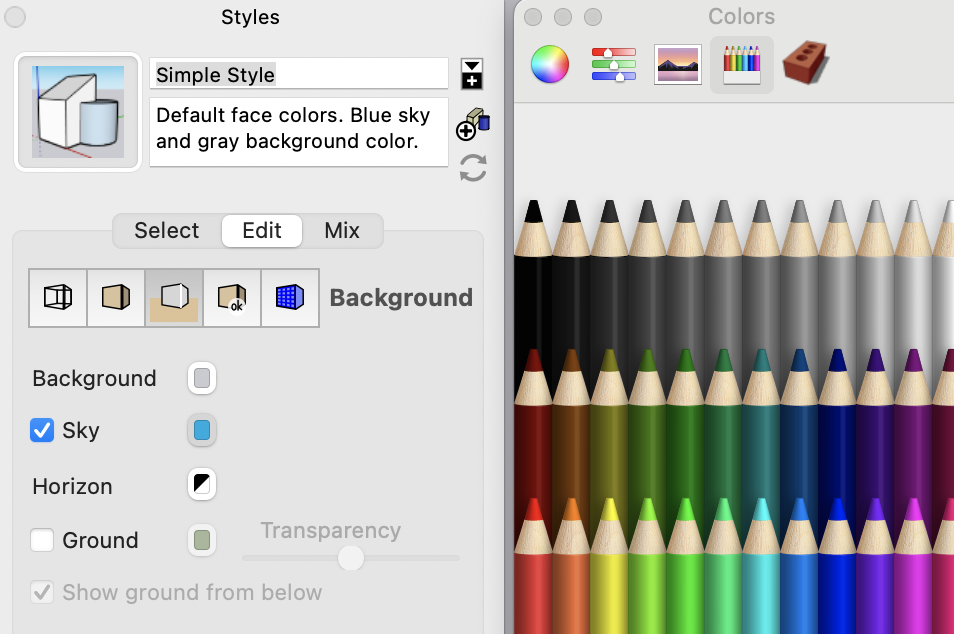
Once you’ve selected the style, click on the “Edit” tab to access the style settings. Look for the “Background” section within the style settings.
Step 5: Choose White Background:
Within the Background section, you’ll find options to customize the background color. Click on the color swatch or dropdown menu next to “Background” to choose a new color. You can disable Sky if you just want one color without horizon.
Step 6: Select White Color:
In the color picker dialog, select the color white. You can either input the RGB values for white (255, 255, 255) or use the color picker tool to select white from the color spectrum.
Step 7: Apply Changes:
After selecting white as the background color, click “OK” or “Apply” to confirm the changes. The background of your SketchUp model will now appear white.
Step 8: Adjust Additional Settings (Optional):
Depending on your preferences and requirements, you may also want to adjust other style settings, such as edge and face styles, shadows, and fog. Explore the options available in the Styles dialog to customize the appearance of your model further.
Step 9: Save Style (Optional):
If you’ve made significant changes to the style settings, you may want to save your custom style for future use. Click on the “Save as” button in the Styles dialog and give your custom style a name to save it to your SketchUp library.
Conclusion: Changing the background of a SketchUp model to white is a simple yet effective way to enhance its presentation and clarity. By following the steps outlined above, you can customize the background color of your SketchUp models to suit your preferences and project requirements, ensuring that your designs stand out with a clean and professional appearance.