Snaptoon + SketchUp: Webtoon Backgrounds with Light & Effects
Leave a Comment / By How to SketchUp / September 18, 2024
Creating compelling webtoon backgrounds can be a complex process, but by using a combination of ACON3D, SketchUp, and Snaptoon, you can streamline your workflow and produce high-quality results. Each of these tools offers unique advantages that complement each other, allowing you to create detailed, stylized, and immersive environments for your webtoon.
1. SketchUp for 3D Modeling
- SketchUp is a 3D modeling tool widely used for architectural and design projects, but it’s also very effective for creating webtoon backgrounds. With its intuitive interface and vast library of assets, it’s ideal for constructing detailed environments, such as cities, rooms, or fantasy worlds.
- You can either build custom 3D models from scratch or use SketchUp’s 3D Warehouse, which has thousands of pre-made models that can be quickly adapted to your scenes.
How to Use SketchUp for Webtoon Backgrounds
- Step 1: Plan Your Scene
Decide the type of environment you want for your webtoon (e.g., urban city, interior of a house, fantasy landscape). SketchUp’s flexibility allows you to design these spaces with precision. - Step 2: Model Your Scene in 3D
Build the scene using SketchUp’s easy-to-use modeling tools. Focus on perspective and depth, which are essential for webtoon panels. Adjust camera angles in SketchUp to match the shots you need for your comic.- Tip: Use layers to separate different elements of the scene, making it easier to hide or adjust elements when exporting for Snaptoon.
Texturing and Lighting in SketchUp
- Basic Textures: Apply simple textures to the surfaces in SketchUp to give your environment a more realistic look. These textures don’t need to be too detailed since Snaptoon will apply a cartoon filter later, but it helps to have some base color and material distinctions.
- Lighting Setup: Although SketchUp isn’t a fully-fledged rendering engine, you can simulate some basic lighting effects. Position light sources in your scene (e.g., natural light from windows or street lamps) to create shadows and highlights that will add realism before converting the scene to a cartoon style.
Exporting from SketchUp
- Step 1: Export the Scene as a 2D Image
Once your 3D model is complete, export a high-resolution image of your background from SketchUp. Ensure that the camera angle, perspective, and lighting are set appropriately for your webtoon’s needs.- Export as a PNG or JPEG for easy integration with Snaptoon.
- Step 2: Save Multiple Camera Angles
One of the advantages of SketchUp is the ability to create multiple views of the same scene from different angles. This allows you to reuse the same background in different panels by simply exporting from different perspectives.
2. Snaptoon for Cartoon Style and Special Effects
After exporting your 3D model from SketchUp, the next step is to transform it into a stylized, webtoon-friendly background using Snaptoon. This is where your 3D environment gets its comic-style treatment, and where you can apply lighting, blur, and particle effects to enhance the scene.
Cartoonizing the Scene in Snaptoon
- Step 1: Import the SketchUp Export into Snaptoon
Upload the image you exported from SketchUp into Snaptoon. The software will automatically apply a comic or cartoon effect, transforming the realistic 3D model into a stylized background that fits your webtoon’s artistic style. - Step 2: Adjust Line Thickness and Shading
Snaptoon allows you to control the thickness of lines and the intensity of shadows to match the desired aesthetic. For instance, a darker, more intense shadow might be ideal for a dramatic scene, while softer lines can be used for lighthearted moments.
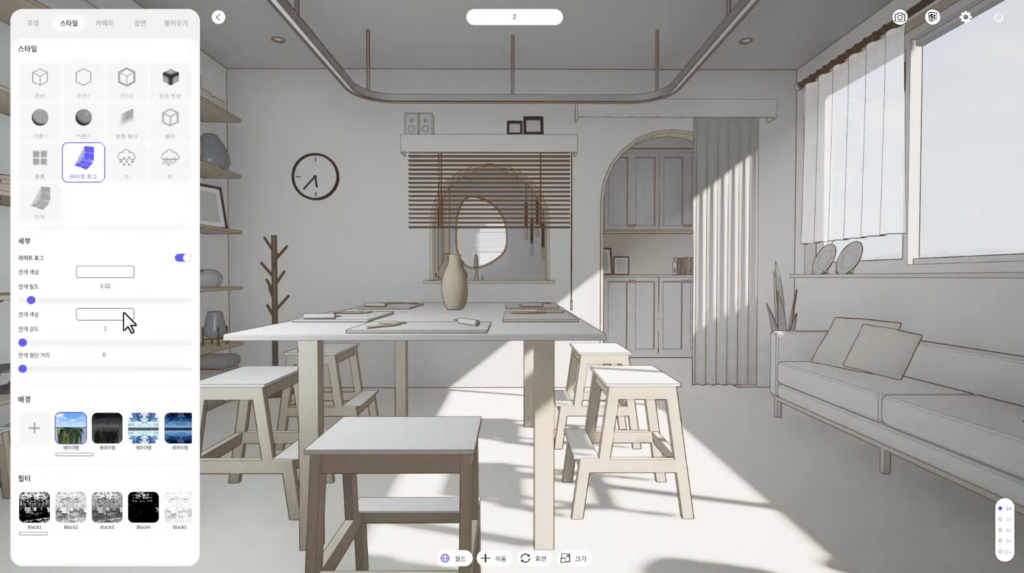
Lighting Effects in Snaptoon
- Snaptoon gives you the ability to adjust the lighting further after importing your SketchUp model. By manipulating light direction and contrast, you can enhance the mood of the scene.
- Bright, Daytime Scenes: You can brighten the entire background, mimicking sunlight or indoor lighting.
- Dramatic Shadows: For nighttime or tense scenes, you can emphasize shadows to create depth and contrast, making the scene feel more intense.
- Soft Lighting: Great for romantic or peaceful moments, where you might want a gentle glow around characters or objects.
Adding Blur for Depth
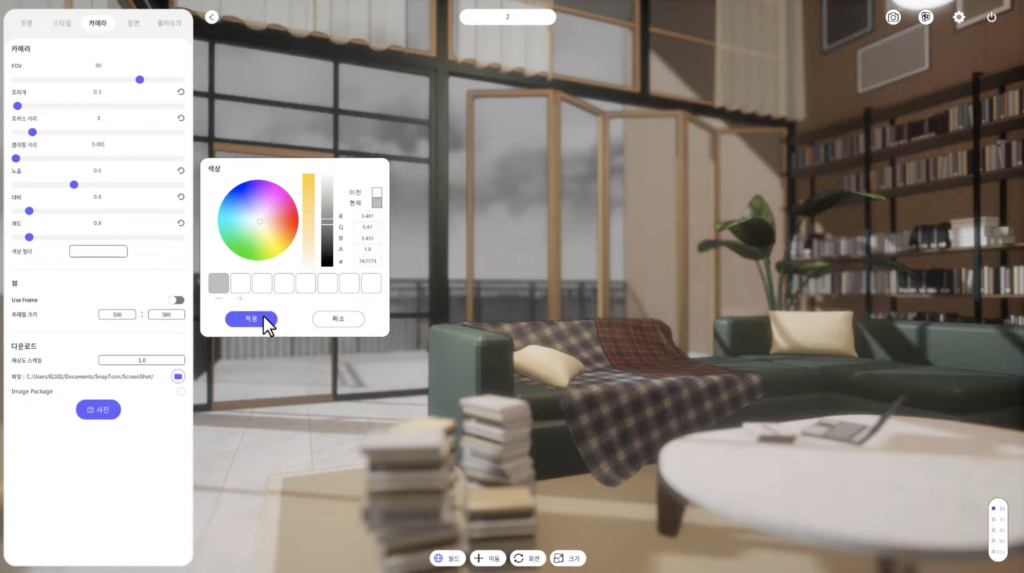
- Depth of Field: Use Snaptoon’s blur tools to create a sense of depth by selectively blurring parts of the background while keeping the main elements in focus. This is perfect for drawing attention to characters or key items in the scene.
- Motion Blur: If the scene involves movement, such as a character running or an object falling, you can apply a motion blur effect to emphasize the action.
- Tip: For fast-moving backgrounds, such as a chase scene in a city, apply blur to elements that are further away or moving quickly, which can enhance the dynamic feel of the scene.
Particle Effects for Atmosphere
- Weather Effects: Snaptoon allows you to add particle effects such as rain, snow, or dust. These effects can greatly enhance the atmosphere of your scene.
- Rain: For emotional or dramatic scenes, raindrops can add a melancholic or reflective tone.
- Snow: Ideal for winter scenes, adding a magical or tranquil atmosphere.
- Fog or Mist: Perfect for creating mystery or adding an eerie tone to your scene. This effect works especially well for forest scenes or desolate landscapes.
- Fireflies, Sparks, or Magic: For fantasy settings, glowing particles or magical effects can be added to emphasize a mystical atmosphere. These effects help bring an additional layer of creativity to your webtoon backgrounds.
3. Integrating ACON3D Assets
- Step 1: Use ACON3D to Source Additional Assets
If you don’t want to model every element in SketchUp, you can use ACON3D to download pre-made 3D models and assets that fit your scene. These assets could be buildings, furniture, trees, or even props like cars or streetlamps. - Step 2: Combine with SketchUp
Import these models into SketchUp to complete your scene, allowing you to create a detailed background without having to build everything from scratch. You can even find specialized elements such as fantasy or sci-fi assets that fit your story’s unique setting. - Step 3: Apply Snaptoon Effects
Once you’ve incorporated ACON3D assets into your SketchUp model and exported it, you can bring the combined scene into Snaptoon for cartoonization and special effects, ensuring that everything looks cohesive.
4. Finalizing the Background for Your Webtoon
After using SketchUp for modeling and Snaptoon for effects and style adjustments, your background should be ready to integrate into your webtoon panels.
Step 1: Import into Webtoon Software
- Export the final image from Snaptoon and import it into your webtoon creation software (e.g., Clip Studio Paint, Photoshop, or MediBang).
- Layer Your Characters: Place your characters on top of the background, adjusting their position and scale to match the perspective and depth of the scene.
Step 2: Final Touches
- Add any last-minute details, such as highlights or additional effects. For example, you may want to adjust the saturation or contrast to better match your characters or make subtle tweaks to lighting to blend everything together.
Conclusion
By using SketchUp, ACON3D, and Snaptoon, you can create complex and highly stylized webtoon backgrounds that enhance the storytelling and visual appeal of your comic. SketchUp provides the foundation with detailed 3D models and accurate perspectives, ACON3D offers a library of ready-made assets to speed up production, and Snaptoon transforms those models into comic-style art while adding lighting, blur, and particle effects. This workflow ensures that your backgrounds are not only visually dynamic but also consistent with the tone and aesthetic of your webtoon.
FAQ: Snaptoon & SketchUp for Webtoons
What is Snaptoon?
Snaptoon is a SketchUp extension built for webtoon and manhwa artists. It converts 3D scenes into stylised 2D panels with line-art, tone, lighting and blur effects ready for Clip Studio Paint or Photoshop.
Is Snaptoon free?
Snaptoon offers a free trial; a paid licence is required for commercial use. It works with SketchUp Pro 2020 and later.
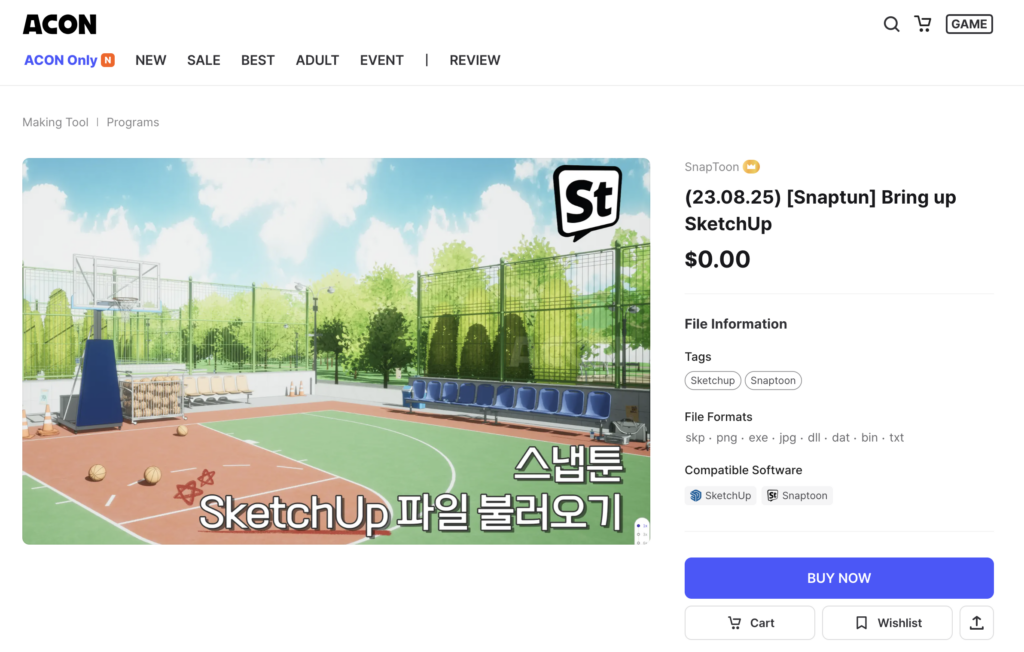
Can I use ACON3D models with SketchUp?
Yes. ACON3D sells professional webtoon-ready 3D scenes as .skp files. Import them directly and combine with your own assets before rendering through Snaptoon.
What's the best SketchUp workflow for webtoon backgrounds?
Model or import your scene → set camera to Parallel Projection → apply Snaptoon styles → export line-art and shadows as separate layers → composite in Clip Studio.