When working in SketchUp, it’s common to hide objects for a clearer view or to manage layers and intricate details. But when it’s time to bring these hidden elements back into view, finding them can be challenging if you’re not familiar with SketchUp’s visibility tools. This guide will walk you through the process of viewing hidden objects, restoring visibility, and managing hidden geometry effectively in SketchUp.
Why Objects Get Hidden in SketchUp
There are various reasons why an object might be hidden in SketchUp:
- Scene Organization: When dealing with complex scenes, hiding objects can help focus on specific areas without distractions.
- Group and Layer Control: Certain objects or details are hidden temporarily to streamline workflows.
- Rendering Adjustments: In some cases, objects are hidden to optimize rendering settings or to achieve a specific view for presentations.
Understanding how to toggle the visibility of hidden elements is essential to maximize your efficiency in SketchUp.
How to See Hidden Objects in SketchUp
1. Use the Unhide Tool
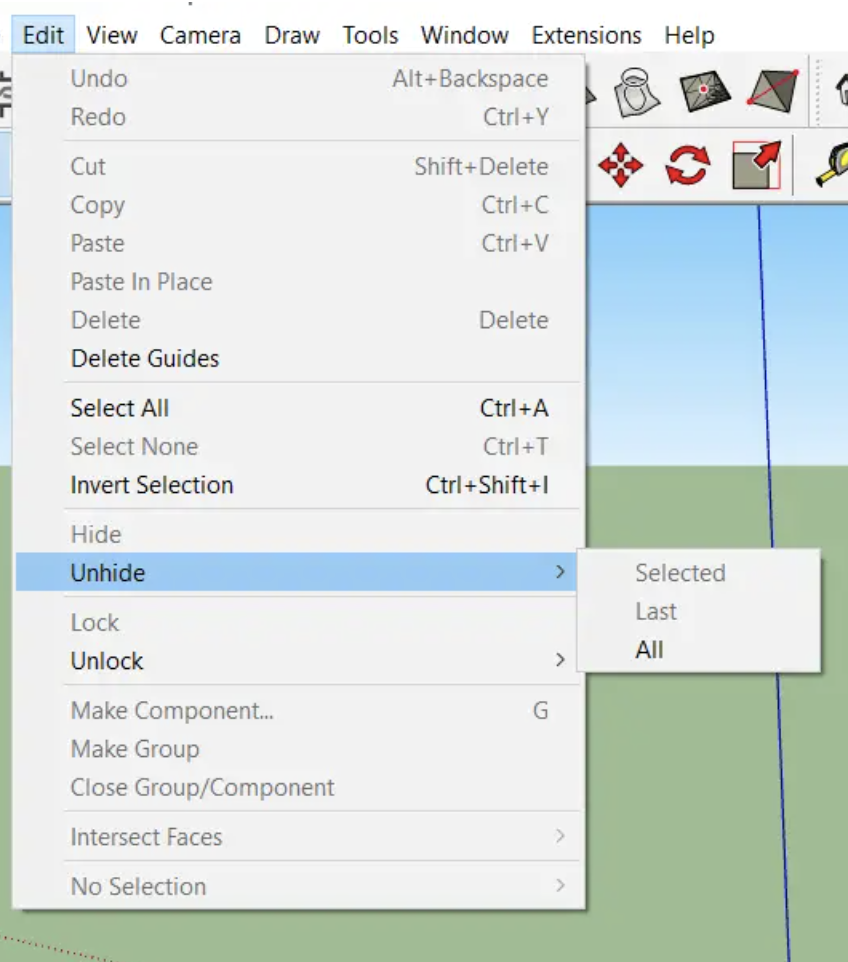
One of the simplest ways to view hidden objects in SketchUp is by using the Unhide tool, which is located in the Edit menu. Here’s how to access it:
- Step 1: Click on the Edit tab in the top menu.
- Step 2: Select Unhide from the dropdown menu.
- Step 3: You’ll see options for Last, Selected, and All. Choose All if you want to unhide everything that’s currently hidden.
This will reveal any object in your workspace that was previously hidden, whether they were grouped or isolated individually.
2. Reveal Hidden Geometry
Sometimes, objects are hidden as part of SketchUp’s hidden geometry. Hidden geometry includes edges, faces, and objects that have been marked invisible within groups and components. Here’s how to show hidden geometry:
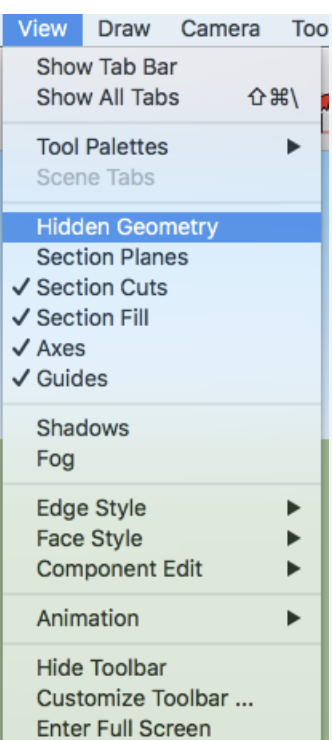
- Step 1: Go to View in the top menu.
- Step 2: Select Hidden Geometry from the dropdown options.
Once activated, this option displays dotted lines representing hidden edges, allowing you to see all elements even if they’re obscured by groups or layers.
3. Use Outliner for Organized Visibility Control
The Outliner tool is a powerful way to manage hidden objects in SketchUp, especially in complex scenes with many groups and components. This tool gives you a hierarchical view of all elements, including their visibility status.
- Step 1: Open the Outliner by navigating to Window > Outliner.
- Step 2: In the Outliner window, you’ll see a list of all objects in the model.
- Step 3: Any hidden object will have a grayed-out name or icon. Simply click the eye icon to toggle its visibility.
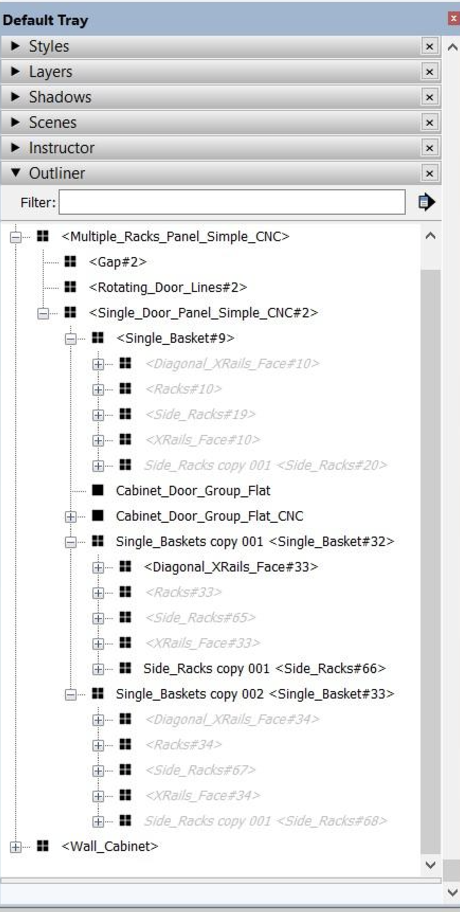
The Outliner is especially useful for restoring visibility to specific groups or components without affecting the entire scene.
4. Managing Layers and Tags for Visibility
For advanced users, SketchUp’s Layers (also known as Tags in later versions) offer more control over visibility:
- Step 1: Open the Tags window by going to Window > Tags.
- Step 2: Tags associated with hidden objects can be toggled on or off by clicking the checkbox next to each tag name.

This method is ideal for selectively showing or hiding specific types of objects, such as furniture, architectural elements, or landscape features, without affecting the entire model.
5. Using Scenes to Control Hidden Objects
SketchUp’s Scenes feature can save and restore specific visibility settings. If you’ve hidden objects in a scene, switching between scenes may inadvertently hide or reveal certain elements. Here’s how to control visibility with scenes:
- Step 1: Open the Scenes panel by going to Window > Scenes.
- Step 2: Each scene can save visibility settings for hidden objects, layers, and tags.
- Step 3: Adjust settings by right-clicking a scene and selecting Update after changing visibility.
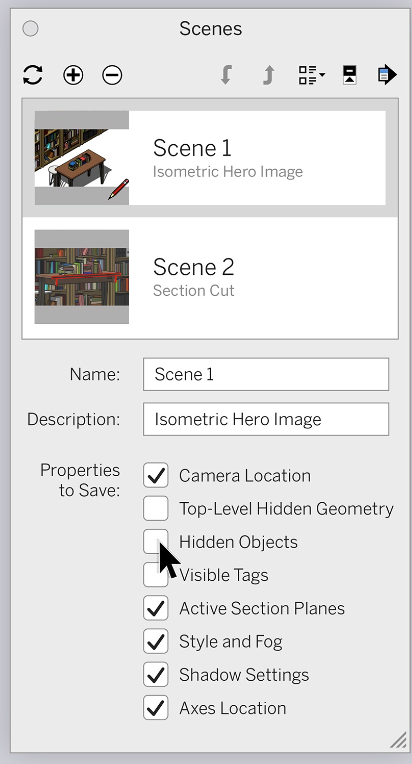
Scenes provide a way to organize different views without permanently altering the visibility of objects in the model.
6. Unhiding Hidden Groups and Components with Right-Click
If you know where an object is located but can’t see it, you can use a right-click menu to unhide it:
- Step 1: Right-click in the area where you believe the object is located.
- Step 2: In the context menu, select Unhide.
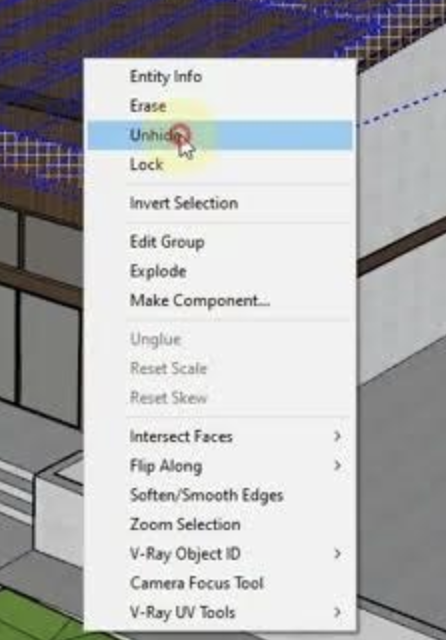
This feature is especially useful for isolated groups and components that were hidden within other objects.
Tips for Managing Hidden Objects Effectively
To streamline your workflow and avoid losing track of hidden objects, try these best practices:
- Label Components and Groups Clearly: Use descriptive names to easily identify hidden objects within the Outliner.
- Organize Layers and Tags: Use Layers/Tags to categorize objects logically, making it easier to toggle visibility.
- Save Multiple Scenes: Store different views of your model with specific visibility settings so you can quickly return to them.
- Lock and Unlock Layers: To prevent accidental hiding, lock important layers that shouldn’t be hidden frequently.
Final Thoughts
Hidden objects and geometry are valuable tools in SketchUp for organizing complex models and creating clean, focused workspaces. By mastering the visibility controls and using tools like the Outliner, Layers/Tags, and Scenes, you’ll be able to navigate, show, and hide objects in SketchUp efficiently.


