UV mapping is a crucial step when applying textures to 3D models, especially for game assets, 3D rendering, or exporting to engines like Unity or Blender. While SketchUp isn’t known for advanced UV tools like Blender or Maya, it still offers effective methods for basic UV mapping — and with the help of plugins, you can go much further.
What Is UV Mapping?
UV mapping is the process of projecting a 2D image (texture) onto a 3D model. The “U” and “V” are the axes of the 2D texture (since X, Y, and Z are already used for 3D space).
Without proper UV mapping, textures may look stretched, misaligned, or broken. SketchUp handles this automatically in simple cases, but for more control, manual work or plugins are needed.
Method 1: Basic UV Mapping in Native SketchUp
1. Apply a Texture
- Select your surface.
- Choose the Paint Bucket Tool (B key).
- Select a material (or import your texture).
- Click to apply it.
2. Adjust the Texture
- Right-click on the textured surface.
- Click Texture > Position.
- Four pins will appear:
- Red Pin: Move
- Green Pin: Scale
- Blue Pin: Rotate
- Yellow Pin: Skew
Move and adjust these pins to manipulate how the texture is displayed.
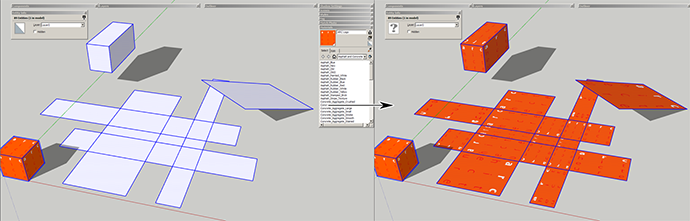
3. For Groups and Components
If your texture looks broken:
- Explode the group (Right Click > Explode) and apply the texture directly to faces, not the group.
Method 2: Advanced UV Mapping with Plugins
SketchUp’s built-in UV tools are limited. For real control, use plugins.
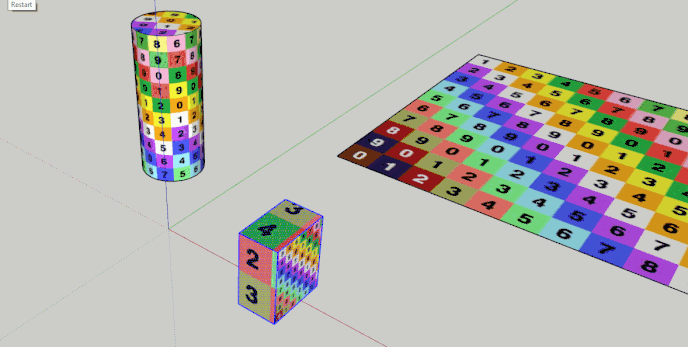
SketchUV
- Free and simple plugin.
- Lets you unwrap UVs more precisely.
- Allows planar, cylindrical, and box mapping.
- Can export UV layouts for texturing in external software (like Photoshop or Substance).
How to use it:
- Install via SketchUcation or Extension Warehouse.
- Select the object and click SketchUV > Unwrap and Export.
UV Toolkit (by ThomThom)
- More control for mapping and aligning textures.
- Best for cleaning up complex UVs.
Pro Tips
- Apply textures face by face for better control.
- Always triple-check your UVs before exporting to other software.
- Use the Monochrome view to detect reversed faces (reversed faces can mess up your UVs).
- Export a UV layout if you plan to paint textures manually.
Exporting to Other 3D Software?
If you’re using SketchUp models in Blender or game engines:
- Export as .OBJ or .FBX using plugins or the Pro version.
- Ensure your UVs are clean and textures are embedded or referenced correctly.
- Check results in the destination software.
Conclusion
UV mapping in SketchUp is possible, even if limited compared to other 3D tools. For architectural models, native tools may be enough. For game assets or detailed texture work, plugins like SketchUV or exporting to Blender will give you more flexibility.
Need pro-level control? Combine SketchUp modeling with Blender UV unwrapping — it’s a powerful workflow.